Introduction
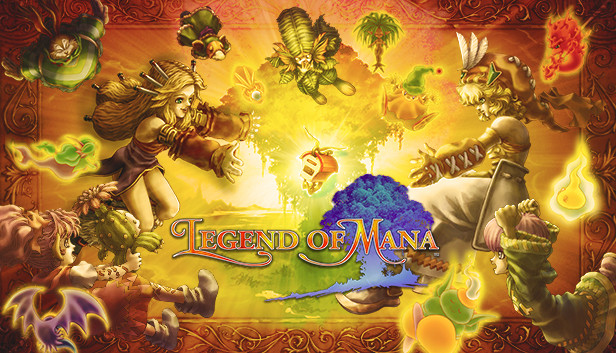
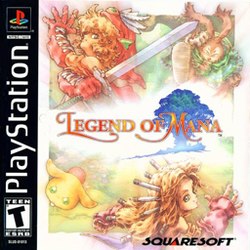
As I was nearing the end of DQ3 I was thinking of what to play next and decided to go for Legend of Mana. I tend to play it about twice every three years and it’d been two years, I thought. Then I checked this site and found it’d been four years!
This is another game I’ve been playing since I was a kid. Four years ago I wrote this post about the game: Legend of Mana. It’s a game I know has some big flaws with it and that nostalgia likely plays a big factor in for me. But I contend that it also does a lot of unique and very cool stuff. I mentioned this four years ago and I still believe it: this game could be made legitimately amazing with a remake. Its flaws are obvious and, in many cases, not too difficult to fix. If some team put some real effort in this game, fixed its flaws, and preserved what it does well this would be a great game.
More Randomizer!?
It’s an addiction, it really is. One cool thing about LoM is that it’s composed of quests/events which each have a name, a little intro, and an ending screen. Most of these events are one-offs that only depend on the needed places existing (more on that in a bit). Thus, there are a ton of orders you can take in the game. Even a creature of habit like me has never taken the same order twice. So with me on my randomizer kick I decided to use some RNG in deciding what event to take on next. This led to a run that, despite all my previous runs of the game, had some notable differences from previous runs.
Character Build
There are a lot of weapon types to pick. Gloves, flails, axes, swords (one-handed and two-handed), spears, etc. I settled on a two-handed sword like I always do. Some things really never change.
You’re allowed to equip two skills and up to four special attacks (basically limit breaks). In the past I always went with High Jump and Crouch for skills and Windslasher and Raging Pain for special attacks. Raging Pain requires use of a bunch of skills to unlock but I’d always settle back on High Jump and Crouch after getting it. High Jump was nice since you jump forward and can crash down for a powerful attack where you start a bit out of melee range and has a quick recovery. Crouch I picked due to my obsession with healing; it speeds up your healing rate. However, it doesn’t scale well so by midgame it really isn’t very good.
I did some different stuff this time. I still unlocked Raging Pain but held off using it until the late game. I tried out other special attacks learned on the way. Splashblade was a good one. Still good damage and it has the hero spawning copies in a line across the screen. Then all the copies do an energy slash forward. Easy to hit enemies with a good damage. I used that in a few others before settling on Raging Pain for lategame. Raging Pain is an awesome attack that can be tough to land but when you do the PC brutally combos the enemy with beams of light flying out with each strike. The PC lays on the sass at the end as he taunts the enemy before finishing with a jumping slash.
Meanwhile, I settled on a different skill set. Flip-Kick is a skill I had used before that I really liked so I put that in instead of Crouch. No wind-up time and you flip backwards out of reach on the recovery. Moonsault was a completely new skill for me. It’s like High Jump in that the PC jumps high but he flips and spins at the same time to make it flashier. If you don’t attack on the jump the PC lands facing the other way so you can jump over an enemy and be facing its back.
Thus, a favorite combo of mine in the game came to be: start just out of reach, Moonsault attack to close and do a lot of damage, downward sword strike, thrust, Flip-Kick back out of melee, Moonsault back in, repeat until enemy dies or breaks the combo. It made for a lot of acrobatics and damage.
World Build
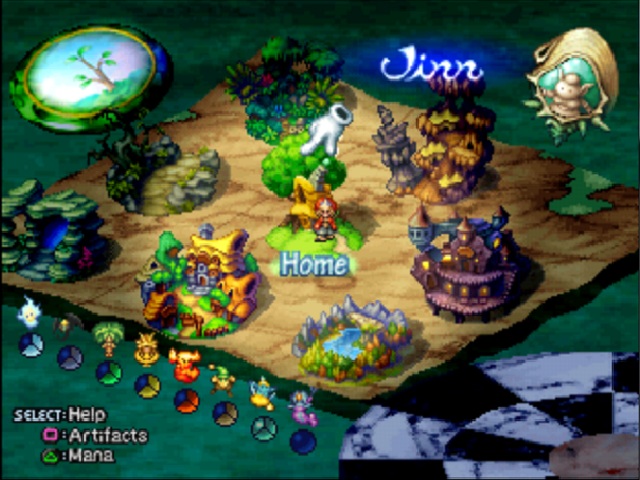
One of the awesome things about Legend of Mana is you build the world. You get artifacts to place on the world map that turn into a place. E.g. the Colorblocks become the town of Domina. As mentioned above LoM is so open ended that even my world maps are never the same though there are some common themes. Here were some notable differences for this playthrough:
- Early Underworld and Norn Peaks. The main purpose of these two areas is for the Dragon Arc which I generally leave for later. The RNG had me start that arc much earlier so these areas were closer to Home than usual.
- Very late Polpota Harbor and Geo. I actually purposely left the towns for a bit later since they sell better stuff the further they are from Home. But then the RNG waited about as long as possible to bring them up after I lifted the restriction.
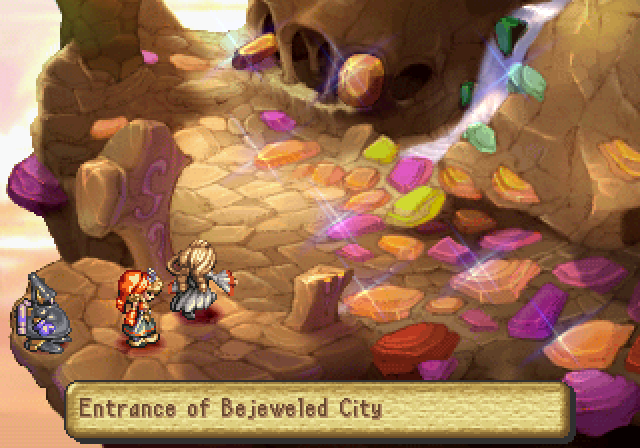
- On that note, that area became a hub for the land of Fa’Diel. Polpota Harbor and Geo, the two largest cities, were right next to each other and next to the beach and SS Buccaneer. The Bejeweled City went next to Polpota.
- Polpota Harbor, Madora Beach, and the SS Buccaneer are all aquatic based areas so need to be placed on or near water. I kept leaving spots on the coast open for these areas but the RNG waited a while before having me place them.
- Full Salamander mana (fire element) for Gato Grottoes which makes sense. Full Salamander and Shade (dark element) for the Underworld which makes a ton of sense.
- Low Undine (water element) mana in the south since all the water themed places ended up in the northwest. Ironically, the desert got a point of Undine while places like Mindas Ruins (which have a ton of plants) had no Undine.
Dungeons/Bosses
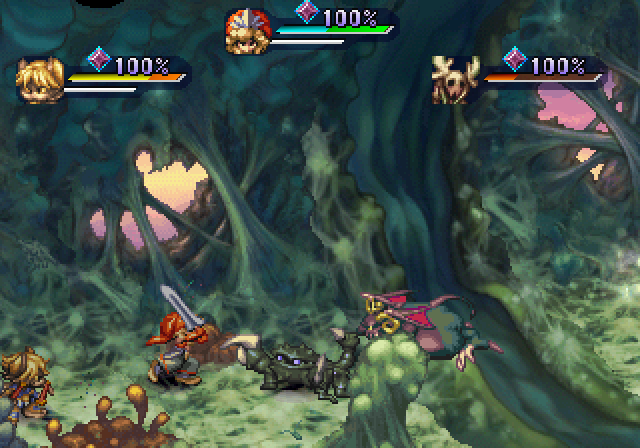
Boss: Tropicallo – This boss is on the ceiling out of reach. It spawns two arms to reach down and attack you. You can sever an arm which becomes a self-acting monster. Kill the monster and the boss uses its HP to make a new arm and that’s how you kill it. Of the two arms one will self-destruct and do a ton of damage and probably OHKO your NPC allies. The other is tanky and takes a ton of punishment.
Fun fact: this boss does not scale well. Play on New Game+ and fight this boss when it’s at Level 90+. I did that once as a kid. Its HP goes up and the arms’ HP goes up but not the damage of regenerating arms. I remember the fight taking almost an hour.
Dungeon: Tower of Leires
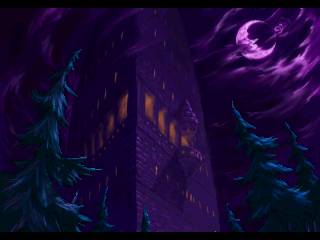
A very cool dungeon you visit twice as part of the Jumi Arc. It’s covered in perpetual night. Well lit on the inside but many of the staircases are outside where there’s a cool purple glow. Also a good enemy selection with stuff like Chess Knight (living chess piece that can shoot lasers because why not?) and Dainslaifs (living swords that are very quick and agile).
***** SPOILERS AHEAD *****
Dungeon: Lucemia and Boss: Irwin
The innards of the wyrm, Lucemia
I love this idea for a dungeon. Lucemia is a huge dragon that once ravaged the land and its carcass is brought back. The dungeon is you going through the innards and climbing on the back of the wyrm. The art throughout is just amazing.
Confronting Irwin
Irwin takes the form of a huge demon. Not a tough fight but Irwin has some flashy attacks and an awesome battle theme. One of his attacks has him hover into the background and shoot a bunch of energy bombs onto the battleground. That battle ground is the head and neck of Lucemia.
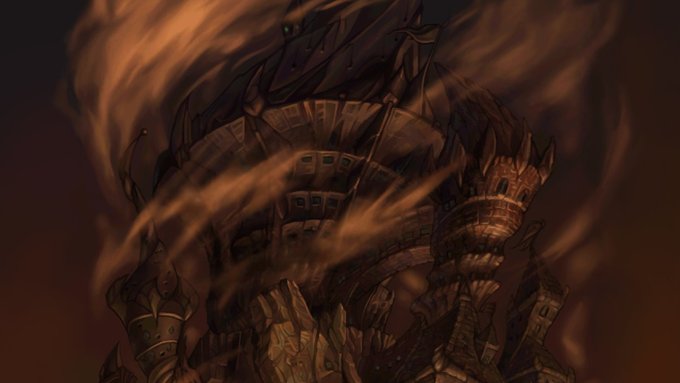
Dungeon: The Flames – This dungeon always confuses me. It’s a dragon emperor’s fortress risen from the Underworld and wreathed in flames. Great enemy selection with dragons, Dainslaifs, and others. What confuses me is that there are numerous hallways with trap doors. You need to find and defeat three mini-bosses to disable the trap doors. Problem is some trap doors only require one boss or two and I have never figures out how to tell before falling or not falling. It also always takes me a while to find the first mini-boss.
Final Dungeon: Tree of Mana and Final Boss: Mana Goddess – The Mana Tree is always a very important location in the Mana games. Much of the tree is scenic and idyllic looking as you climb up branches and roots. In some spots you need to go inside the tree where you will find a surreal setting.
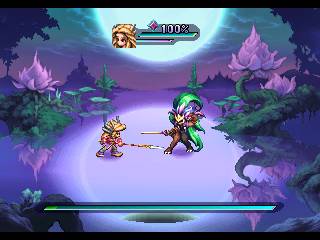
At the end you get teleported to a reflective battle arena with a moon shining above and reflected on the floor. You confront the Mana Goddess. I’m not going to lie, you’re too powerful in the endgame for anything to stand against you. But the MG puts up a good effort. Unlike most bosses she’s about your size and she’s quick too. Her special attacks involve a variety of energy blasts with some involving her calling on the moon.
Difficulty
As has been alluded to this game on normal mode is pretty easy. It ranks 141st out of 149 on my difficulty spreadsheet, near games like Pokémon Moon and Super Mario 3D Land, with a score of -12.00 (the current median is 16.00 with the 75th percentile being 39.42 and the 25th percentile being 6.29). I would actually say it’s easier than those two games.
External Music Links
Legend of Mana has a lot of great music in it. Here are a tracks I especially enjoy.
The Wind Sings, For the Journey – Theme for areas like Lake Kilma, conveying a sense of going through scenic wilderness.
Pain the Universe – The standard boss theme. Great song for a boss fight and bonus points for a cool name too.
Colored Earth – Theme for areas like Mekiv Caverns and the Tower of Leires, areas that convey a sense of danger or that you have an important mission in.
Irwin On Reflection – Battle theme against Irwin.
***** PLOT AHEAD *****
Overview
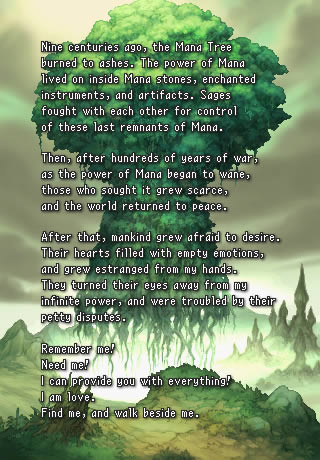
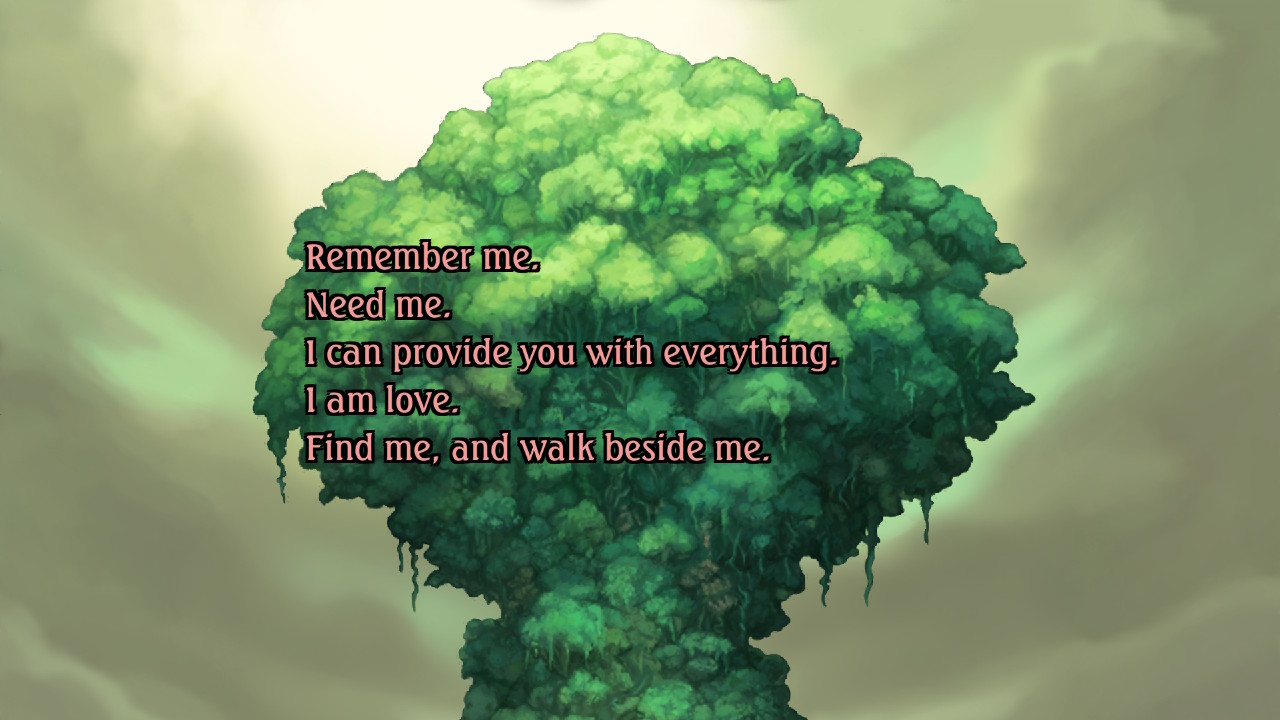
The Mana Goddess speaks in the opening
The plot is heavily episodic. There are several one-off adventures and a few relatively short arcs. The main plot factors in only in the intro and at the very end. The end is unlocked by completing at least one of three major plot arcs, described below. The overall theme is characters dealing with love and desires and the consequences, good and bad. The idea is that even though bad stuff happens as the characters reach for their dreams that ultimately it’s better to strive for them than to just give up on them.
The Fairy Arc

Matilda (Old)

Daena

Escad

Irwin

Matilda (Young)
AKA Daena the only sane person and her crazy friends. This arc focuses on romantic love: Matilda the priestess and Irwin the half-demon fell in love as teenagers. Them being together was not allowed so one day, 10 years before the game, they snuck out to the mines. The mine entrance collapsed and Matilda panicked. She complained about the unfair world that kept her and Irwin apart and declared she wanted to go to the Underworld. Irwin then decided that if his love hated the world so much he would destroy it. He stole Matilda’s elemental powers and disappeared. This caused Matilda to age rapidly such that when the game takes place she’s a 26-year-old in an 86-year-old’s body.
Thus is the conflict set. Irwin becomes lord of the faeries, who hate humans and are fully on board with him destroying the human world. He wants Matilda to join him in the land of the faeries where she could reform her physical appearance as well. Matilda’s childhood friend Escad always hated Irwin and knows he’s up to no good. But he’s right for the wrong reasons; the game makes it seem like it’s just racism and jealousy that drives Escad. He is so narrow minded that he attacks Daena, another childhood friend who also wants to stop Irwin, because she wants to take a more diplomatic approach. Daena meanwhile knows Irwin must be stopped and tries to do so. She quickly finds she is no match against him. Instead, she wants Matilda to join Irwin to set up a win-win: Matilda will be saved by staying in the land of the faeries, Matilda can convince Irwin to stop his plans, and the two can live happily together.
Matilda starts off wise and reasonable. She has forgiven Irwin despite her continuing aging. Even though she appears less free than ever she now finds her happiness and freedom by helping others to be free. As Head Priestess of Gato she accepts nuns who previously never had a chance to be accepted. Then the end of the arc comes. She finally reunites with Irwin and learns of his plans. She then declines to go with him. In fact, she doesn’t try to get him to stop trying to destroy the world at all. When Daena asks why she simply states that she loves Irwin and if destroying the world makes him happy then she’s happy.
….What!? Daena rightfully calls Matilda out on this, considering this will deny life and freedom to thousands of innocents. Daena then bluntly says, “Then I’ll kill him! Is that what I’m supposed to do!?” And Matilda responds with a similar, “If that’s what makes you happy.” Mind you, Matilda is revered for her wisdom and is even chosen to join the Seven Wisdoms. Well, if this is wise it flies right over my head. Anyway, this sets up Daena and the hero finding Irwin and killing him. Matilda dies before they return. Matilda and Irwin meet in the Underworld but Irwin still can’t reconcile his feelings for her so he wishes to be born again as a demon and disappears, leaving Matilda heartbroken. Matilda is made out to be a tragic figure and she surely is but it occurs to me that Daena has all her childhood friends die including having to kill half of them herself.
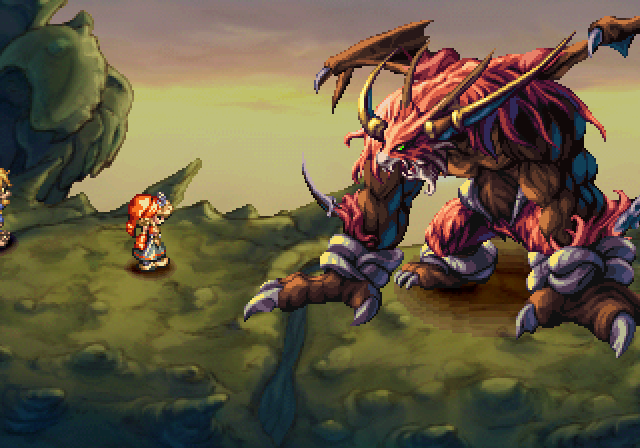
Dragon Arc

Larc

Sierra
This arc focuses on familial love and is the most straightforward of the three. The hero is tricked into helping a dragon, Drakonis, and his dragoon, Larc. Both Drakonis and Larc are dead and reside in the Underworld but found some way for Larc to temporarily leave. Larc is tasked with getting power from Mana Stones guarded by three great dragons. Drakonis claims the dragons stole the power from him out of greed and jealousy.
It soon becomes clear Drakonis is not a benevolent dragon. Larc and the hero clash with another dragoon named Sierra who demands to know why Larc helps Drakonis. It turns out the two are brother and sister. Larc kills two of the dragons but Sierra’s dragon, Vadise, surrenders the Mana Stone without fighting. After that, the hero is free of Drakonis’s curse and helps Sierra go after Larc.
Drakonis in his fully powered form
Finding Larc and Drakonis Larc explains he knew he was doing wrong but wanted to return to Sierra. He made a deal with Drakonis that when the time of return came they would fight and only the victor would return. However, Drakonis betrays Larc and curses him. Sierra and the hero defeat Drakonis. The world is saved but Larc still has the curse of Drakonis’s blood which binds him to Drakonis. However, after some unknown length of time Larc is able to free himself of the curse and return to Sierra.
Jumi Arc (lengthy, skip to bottom for conclusion of main plot)

Pearl

Elazul

Sandra

Lady Blackpearl
This arc focuses on community love. I’ve always loved this plotline so I’ll go into the most detail here.
On his first trip to Domina the hero finds a knight named Elazul who is searching for someone. He’s very rude and outright interrogates people. There’s also a strange gem on his chest that glows. The hero helps him out and they search Mekiv Caverns. In the cave is a strange woman who tells the hero to stay away from people like Elazul lest the hero turn to stone. Before she can be questioned the two hear a scream and go to investigate. They find Pearl, the woman Elazul was searching for. She also has a strange gem and her gem glows in reaction to Elazul’s. The two give their thanks and leave.
On the first trip to Gato the hero meets Rubens, a guard of the temple. Rubens got a note from a jewel thief named Sandra saying she would steal the “Flame of Hope.” A big-mouthed mouse-man named Inspector Boyd is also there and he’s been chasing Sandra for some time. Rubens gets into an argument with a nun who stabs him. It turns out Rubens has a gem in his torso too. While Rubens is incapacitated the nun demands he shed tears for his life but Rubens mysteriously says he can’t. The nun, who turns out to be Sandra in disguise, takes the gem from Rubens which causes him to disappear in a flash of light. Inspector Boyd says that people like Rubens are called Jumi and the jewel they have is their core. Sandra is not just a thief, she’s a murderer that has killed several Jumi by removing their core.
The hero encounters Pearl at the Tower of Leires. She got separated from Elazul but feels something in the tower is calling her. The hero helps her reach the top where they see a mysterious woman that looks like Pearl. The woman disappears and the hero fights a monster that appears. Elazul comes in after and Pearl begs him to stay for a bit longer; Pearl has amnesia but she feels like the tower is helping her remember. Elazul leaves Pearl with the hero for the time being. The hero and Pearl walk back to the bottom but are stopped by Sandra. Sandra declares that Pearl’s core is hers and summons a Jewel Beast to get to Pearl. The hero defeats the beast and Pearl demands to know why Sandra hunts them. Sandra cryptically answers, “Listen to your core,” and escapes. Pearl reflects that Elazul has been searching for other Jumi. She says that if he finds another “guardian” he’ll leave her and then she’ll be a sitting duck. She leaves hoping that Elazul never finds other Jumi.
Later the hero comes across Elazul and Pearl. Elazul wants to go to Geo but Geo has historically been dangerous for Jumi as there have been shops there that sold their cores. One reason the Jumi are close to dying out is that people believed their cores had magical powers and so people hunted them to get their cores. Elazul has Pearl stay at the hero’s house while he and the hero go to Geo.
In Geo the two find a Jumi named Esmeralda. Esmeralda has been studying magic at the academy in Geo. She explains that she and her sisters used to live in the Bejeweled City but then they had to flee and were separated. The Jumi left the Bejeweled City when Florina, the last Jumi who could cry, disappeared. Jumi tears hold their life force and so have miraculous healing powers, up to and including being able to restore Jumi who lost their cores. It used to be the Jumi would travel in pairs, a knight and a guardian. The knight would protect the guardian and the guardian would shed tears to heal the knight’s wounds. However, at some point most of the Jumi, even guardians, became unable to cry. Only Florina was left with that ability. That’s when the Jumi gathered and found the Bejeweled City with Florina there to heal everyone’s wounds.
The three search for and find the cores of all Esmeralda’s sisters. But then Sandra kidnaps Esmeralda. Elazul and the hero find the two in a storehouse where Sandra is demanding that Esmeralda cry. However, Esmeralda can’t and Sandra takes her core and her sisters’ cores and then escapes. Elazul is furious at Esmeralda’s death. He regroups with Pearl at the hero’s home and the two leave.
Soon after Elazul shows up again and asks for the hero’s help as Pearl was taken by Sandra. They track the two down to a cave. At the cave is a strange man that talks about the beauty of jewels. Elazul confronts Sandra but Sandra scratches his core with a dart, incapacitating him. With the situation grim Pearl asks for the power to fight. She turns into the woman from Leires: Lady Blackpearl. Sandra knows and fears Blackpearl and escapes. Blackpearl apologizes to Elazul for having been a burden on him and leaves. Elazul stays at the hero’s home to recover but then leaves to search for Pearl.
The hero finds Elazul at Leires and they go to the top and find Pearl and Blackpearl there. Blackpearl is trying to get Pearl to become the Clarius, the Jumi who cries. However, Pearl refuses when it’s revealed that the Clarius sacrifices her life for the Jumi. Elazul steps in and he and the hero fight Blackpearl. After beating her Blackpearl agrees to leave for a time and disappears, saying that Pearl is hers. Blackpearl also warns the hero that the old legend is true: those who cry for the Jumi turn to stone, warning the hero to stay away from them. Then Elazul and Pearl leave.
The hero, Elazul, and Pearl find Diana in Geo, the leader of the Jumi. She explains Sandra’s motivations: revenge. The Jumi used to cry for everyone, not just Jumi. But after being hunted for so long they lost the compassion needed to shed their life for others, all except Florina. Also, Sandra is actually a Jumi herself! Florina was near death from shedding tears for the Jumi. Sandra couldn’t stand a race that survives by sacrificing such a kind person. Sandra then appears in a rage and accuses Diana of starting a war with Deathbringer (leader of the game’s evil empire), knowing they would be invincible with Florina to heal them. Sandra takes Diana’s core and escapes. Elazul and Pearl grieve afterwards but Elazul reflects on what was said and realizes the Jumi have to rediscover their compassion for others.
Elazul, Pearl, and the hero find Florina sealed in Pandora’s Box in Geo. Florina turns Pearl into Blackpearl to explain what happened: Blackpearl was Florina’s knight. When the Jumi realized Florina was dying they sent Blackpearl to find the Mana Sword hoping to save her. Alexandra was made Florina’s temporary knight. Alexandra couldn’t stand seeing Florina die and so kidnapped her. Blackpearl confronted Alexandra and the two argued. Alexandra surprised Blackpearl by hitting her core with a dart. With her core wounded Blackpearl turned into Pearl which is when Elazul first found her. Now Pearl can transform between herself and Blackpearl. Alexandra went on to become Sandra the jewel hunter.
The hero picks one Jumi and goes to the now abandoned Bejeweled City. The city is in pristine shape but empty. There are apparitions of the Jumi in the last days of the city. That and the depressing music set up a great atmosphere driving home that the Jumi are now nearly dead. The group confronts Sandra and the strange man, the Lord of Jewels. Sandra reveals that if the Lord of Jewels eats 1,000 Jumi cores he will be able to shed tears for Florina and restore her life. He then consumes the 999th core, the Jumi that the hero didn’t choose. The two fight the Lord of Jewels and beat him. Sandra then sacrifices herself to be the 1,000th core. Another fight ensues and the heroes win again, destroying the Lord of Jewels.
Afterwards, the Jumi you picked reflects that him/herself and Florina are the only Jumi left. The hero sheds a tear at this revelation. As was predicted, the hero turns to stone. But then, somehow, all the Jumi consumed by the Lord of Jewels return to life! Elazul and Pearl reunite and convince the Jumi to try to produce a Teardrop Crystal to restore the hero. They are successful. It’s a very moving scene. You can visit the Bejeweled City afterwards and find it now populated with Jumi, including Pearl, Elazul, Rubens, Diana, Esmeralda, and Florina. You can also find a note from Sandra asking you to take care of Florina.
Endgame
After beating one of the three main story arcs you unlock the endgame. While short (and likely rushed, from what I’ve heard) it does provide a summation of the game’s theme on going for what one wants, especially love, despite the risks.
Some sproutlings get together outside your house and talk about reviving the Mana Tree. Nunuzac the sorcerer imprisons one in a dream cage to prevent the Tree from coming back. Pokiehl comes to persuade Nunuzac to let the sproutling go. Pokiehl argues that the Tree will enrich everyone’s lives. Nunuzac argues that villains will seek that enrichment and will kill others for it. In the end, Pokiehl persuades him. The hero goes into the dream cage and finds the Sword of Mana, the last artifact. It unlocks the Tree of Mana.
The Tree of Mana is the embodiment of love, for good and bad. It has a dark side and monsters in it. The Mana Goddess admits she has a dark side and it is that dark side that needs to be overcome to bring peace to the land. That’s why the Mana Goddess is the final boss. Beating her lets the sproutlings reach the Mana Tree and revive it.
The ending is pretty symbolic and doesn’t make a lot of sense, admittedly. Personally, I think the world was still tied to the hero from having unsealed it from the artifacts. The hero would die eventually and when that happened so would the world. Reviving the Mana Tree made the Tree sustain Fa’Diel instead of the hero. There’s no evidence for that in game; it’s just my thoughts.