Tag Archives: Sea of Stars

Sea of Stars – Post 2

Past Post

Post 1

***** SPOILERS THROUGHOUT POST *****

Team Update

Valere – Moonerang was still a heavy hitter and great if a foe had multiple Moon locks. Lunar Shield heals a small amount and establishes a shield on each party member to block one hit.

Zale – Sunball still does good AoE damage. Dash Strike does a Slash and Sun to all foes and was necessary for some lock formations.

Garl – Garl struggled to find a spot in my party as time went on. He can only break one kind of lock and Nourish is still okay but Mending Light and a new character were doing better.

Seraï – I used Disorient more and more. Hammer and Poison damage, but more importantly it delays the target’s action by two. Necessary to break some locks or just useful to slow an enemy down.

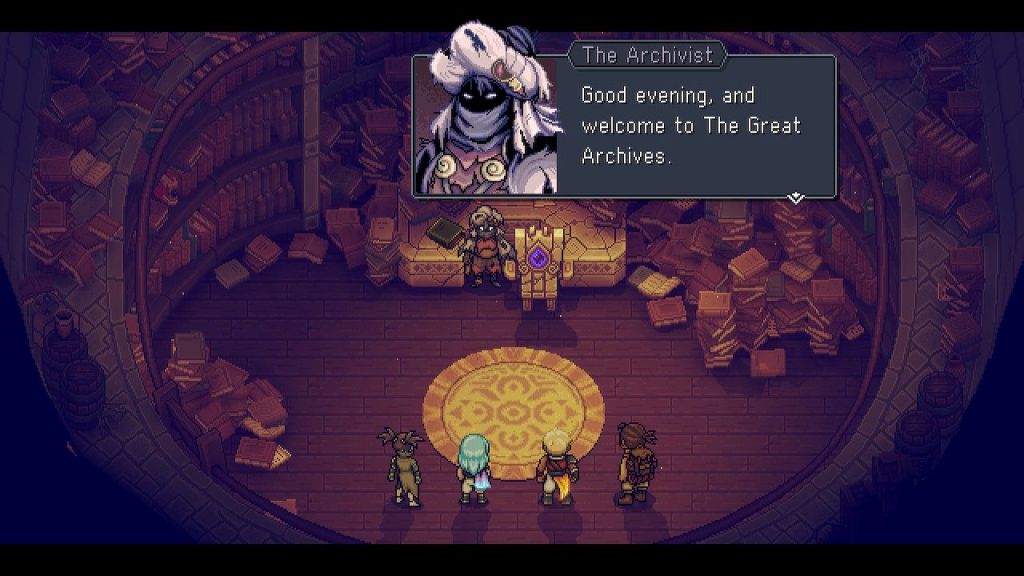
Resh’an – The Immortal Alchemist joins you. His attack can be timed to be AoE. He gets an on-demand AoE heal in Petrichor. His attack does Poison, he can imbue with Arcane, and he has Ebb to radomly erase any two locks. Very useful.

And that’s before his Ultimate, Great Eagle. All the other Ultimates are powerful and flashy AoE attacks. Great Eagle does high AoE damage, heals the party including revive, and delays any surviving enemies. It’s very OP and can turn a whole battle.

B’st – The last character. He joins pretty late. Good physical and he gets the Arcane element. He also gets a revive skill, the only one (otherwise you revive with an item or waiting for KO to wear off). He also got a lot of time on the bench.

Dungeons and Bosses

Meduso

This was a fun and challenging fight. A take on the classic Medusa, it’s a machine boss with tentacles that pull up cannisters. These cannisters all charge an action and if not disrupted those actions can be single attack, AoE attack, or healing Meduso. You need to disrupt as many as possible and otherwise prioritize targets and actually hitting Meduso.

The challenge comes at low HP when Meduso starts using a purple cannister. That gives him an AoE attack that did about 70% of my team’s max HP. From then on disrupting those cannisters was priority one.

Sky Base

This dungeon was a lot of fun. You start in a futuristic base high in the sky. As you go on you go into space. The visuals are amazing in showing sky then space in the background yet not impeding seeing where your characters actually are. The enemies are appropritately mechanical and the flavor text of the puzzles was fun too.

The Catalyst is the boss here. It’ll generate six machines you need to defeat to damage the main unit. And when you do that you have to be quick as it’ll regen the machines. The machines can be laser turrets, missile launchers, and healers. Juggling all the different types and prioritizing targets while also juggling your own resources was a fun challenge here.

The Catalyst

Late Game Sidequests

Much like Chrono Trigger you get a bunch of endgame sidequests tied to your characters’ backstories that also gives them their ultimate equipment. It didn’t have the same oomph as CT though. Much of the ultimate equipment doesn’t have cool extra effects, just more attack. Many of the bosses are recolors of early bosses.

One cool new boss was the Gun Goddess. Her thing is she summons six gun shells. They’re extra targets and dilute your attacks. If you leave them out she gets powerful attacks. Zale’s Dash Strike is a pure AoE that doesn’t get diluted by number of targets so it was good here.

Difficulty

Sea of Stars measured out at a 44.74, 43rd out of 194 (78th percentile). That’s next to games like Dragon Quest VII (PS1) and Final Fantasy Tactics War of the Lions. That was a shock to me as my experience was SoS was a lot easier than games like those. I googled around and saw mostly posts of people saying it was easy too.

Reminder that my source is checking difficulty ratings on GameFAQs. But SoS is multi-platform so I always check the platform I play on. The ratings for the PS5 and PC versions were much lower. I doubt there’s many, if any changes, to those versions. I guess Switch players just had a more difficult time with this game. Personally, I’d put it more like around Bravely Second, which had a 3.08.

Conclusions

This was a fun game with some mechanics I hadn’t personally experienced before and I liked it. The pixel art was amazing and the soundtrack catchy. Put this down as another indie game I enjoyed.

***** PLOT SECTION *****

Clockwork Tower

Resh’an, the Immortal Alchemist, joins the party to help them reach the revived Dweller of Strife. He cannot help fight the Dweller or the Dweller’s creator, Aephorul the Fleshmancer, will be allowed to return to the world as per their agreement.

In the Clockwork Tower some strange children with old faces work. They are geniuses that were forced to work for the Fleshmancer as children. Time does not flow for those inside the tower but continues if they leave. The geniuses have worked for so long they will immediately die of old age if they leave. But they have worked to sabotage the Fleshmancer when they can. They have made a device they believe will help against Strife.

The team confronts the Dweller of Strife. Even eclipse-boosted Solstice Magic barely hurts it. But the geniuses’ device focuses Solstice Magic into a powerful beam that hurts Strife. Then Strife destroys the device. Valere and Zale try to fight Strife on their own but to no avail. Seraï demands Resh’an help but he refuses. Seraï angrily takes a vile of Resh’an’s and chucks it at Strife.

This counts as Resh’an attacking Strife. The Fleshmancer appears. He rewards the Acolytes for their service and they disappear through a portal. He also rewards Brugaves and Erlina, the heroes’ treacherous mentors. They disappear too. He also sends Strife away. These are tie-ins to the developers’ earlier game, The Messenger. Most of these servants become powerful demons in that game.

Some flashbacks give context to Brugaves’s and Erlina’s betrayal. Reminder that Solstice Warriors are anyone born on a solstice, not volunteers. They never had appropriate temperments for such a job. Then when they were still kids all the adult Solstice Warriors went to fight Strife and only one returned. Finally, the Acolytes told them about the Dweller of Torment, who would’ve been invincible if not for Resh’an and Seraï. From Brugaves’s and Erlina’s viewpoint they were forced to fight horrific monsters to save a world that was screwed anyway. The Acolytes gave them a way out.

Aephorul demands an “eye for an eye” on Resh’an’s transgression. He fires a beam amd Garl steps in front. He takes a mortal hit and is about to die. A Potion of Borrowed Time keeps him around to help his friends one last time.

The Sea of Stars

Garl’s borrowed time is used to help convince a council of giants to allow the party onto the Sea of Stars. I was a bit lost at this part. But it’s the game’s title and Garl worked really hard to get access to it so I figured it was important.

Then when the team was about to go on it they admitted they didn’t know what it was either. What?? You did all this work and it’s the title of the game and we don’t know anything about it??

When his task is finished Garl dies. An emotional funeral is held. Valere and Zale mourn their friend.

The Sea of Stars ends up being a sea between worlds. Very cool visuals when going through it.

A Hopeless World

The team ends up at the world Seraï is from. It’s a world already ruined by the Fleshmancer and where his lair is. Seraï reveals that she is a cyborg by taking her mask off. Her jaw is robotic and she looks deformed. All her people are cyborgs. The Fleshmancer had them transformed into cyborgs and eternally tormented so their souls would be neverending nourishment for the Dweller of Dread.

To further protect Dread, the sky is perpetually blocked and the moon was sunk into the ocean. In order to fight Dread, the group goes to Sky Base which has been pumping out clouds to block the sun. They shut that operation down.

While exploring the group finds the spirits of a whole race wiped out by the Fleshmancer. One wants to help. Resh’an puts it into a Living Glass Golem. The spirit golem joins the group as B’st.

Then the team goes to Dread. Dread lairs near the moon. There’s no eclipse but Valere and Zale have grown so powerful they destroy Dread just by having access to sun and moon.

The Final Confrontation

Finally, the group goes to the Fleshmancer’s Lair. It’s a sickening place with strange meat and organs all over and an appropriately sickening theme.

When they find the Fleshmancer he sics his champion on them. It’s Erlina, now a demon sorceress. The team emerges victorious. As per his agreement with Resh’an, the Fleshmancer leaves the world once again.

It’s time for Valere and Zale to go too. They have grown powerful enough to ascend into Guardian Gods. They leave as balls of light, bringing down a nearby World Eater as they do so. Years later, they revisit their home world every year on Garl’s birthday.

There is a true ending and a different final boss. I didn’t go for it though. Mostly because I found out you need to get all 60 Rainbow Conches (collection quest). I had 39. And while it was a good game I was about ready for it to be done.

Sea of Stars – Post 1

Introduction

Sea of Stars is an indie RPG released in mid-2023. It’s inspired by turn-based retro RPG’s. It received a bunch of hype and acclaim leading up to and after its release. Oddly enough, most opinions I’ve seen recently have been negative. My impression is it was so hyped up for a while that now a new wave of players have gotten to it with sky-high expectations and found it not hitting that mark.

Anyway, I was still excited to play this game.

Combat Flow

I’ve never played Super Mario RPG but SoS has some mechanics that remind me of what I’ve seen in SMRPG. There are timed hits and blocks all over the place. Pressing A at the right time increases attack damage and decreases incoming damage. Many special attacks give a timing mini-game. E.g. Moonerang is an energy boomerang that bounces off enemies. You can keep it going for more hits by having its user, Valere, block at the right time.

Standard attacks don’t do a ton of damage but still fill several vital roles. First, your characters don’t have a ton of MP and will run out after a couple casts. Each standard attack restores MP. Next, attacks generate “live mana.” Live mana can be applied to an attack to boost its damage and add the character’s element. This can both help disrupt an opponent or do a lot more damage to a foe weak to the applied element or who is strong against physical damage.

Combat is turn-based but in a way I haven’t seen before. You choose what order your team moves in every round. Enemies have a displayed counter; every turn decreases the counter by one. You can use that to prioritize who you’re hitting or disrupting. Most enemies only get one action per round but some are in a sort of Haste state where their counter resets after every one of their actions without waiting for end of round.

Enemies have to charge up their special skills and spells. When they do you get a chance to disrupt. A number of cards, called “locks,” are displayed and if you clear them all the enemy loses their turn. E.g. An enemy might have two hammers, a sword, and a sun. That means if you do a hit of each type before its next turn they lose a turn. Having your own skills and live mana ready is important to disrupt enemy skills because they hit the most locks. E.g. Valere using live mana to imbue her next attack and getting a timed hit (gives extra attack hit) will hit two hammers and one moon in one attack. And enemy skills tend to be powerful, whether it be powerful AoE or other effects, so they’re worth disrupting.

Actions, especially timed hits and disruptions, will build your Combo meter. Combos are collaborative actions by two of your team but unlike Chrono Trigger they only take one participant’s turn. I’ve been a bit underwhelmed by Combos so far. Most take two full Combo bars. By far the best two-bar Combo for me so far is Mending Light, a powerful AoE heal in a game without a ton of healing otherwise. None of the attack Combos do enough damage to make up for not healing my team unless it’s to end a fight.

Characters

Valere – The Winter Solstice Warrior. Her element is Moon and her weapon is the bo staff, like Donatello from TMNT. She has the aforementioned Moonerang which hits all enemies and does good damage if I don’t mess up the timed hits. Her offense is pretty good and she is one of the two that Combo for Mending Light.

Zale – The Summer Solstice Warrior. His element is Sun and he uses a curved sword. I tend to use Sunball, where he conjures a fireball that explodes to hit the target and nearby enemies. It does high damage. Dash Strike hits all foes with a Sun-inbued slash and so can be good for disrupting foes if a bunch reveal slash and sun cards. He had our first healing spell in Healing Light but it falls behind quick. But it’s what makes the Mending Light Combo possible which remains great.

Garl – Childhood friend to Valere and Zale. He is a Warrior Cook wielding a cauldron lid and spoon. I haven’t used his attack skills much. He does good physical damage but he doesn’t have an element which can hold him back when disrupting foes. He gets Nourish which heals about as much as Mending Light but to one target and using 8 MP instead of two Combo bars.

Seraï – An assassin that comes to the group’s aid. Her stats are lower, especially HP, but she’s been keeping up well. Her element is poison but there are no status ailments in this game so it’s just an element like moon and sun. Venom Flurry is like Moonerang, doing limitless hits as long as you can keep up the timing. I love the animation for Phase Shiv: she makes a portal, casually walks in, emerges behind the enemy, and stabs them. It also does high damage.

***** SPOILERS THROUGHOUT REST OF POST *****

Dungeons/Wilderness

All the areas in this game look great. The pixel art is well done and each area has its own identity. And everything looks so detailed, it really helps my immersion.

Abandoned Wizard’s Lab – Filled with strange devices, colorful prisms, and mechanical guards. This feels like an old wizard’s lab. The enemies spread out their weaknesses: some are weak to physical and some magical. The Crystal Tulip has 1 HP and is immune to damage: it is killed by breaking its locks.

Necromancer’s Lair

Green, sickly water all over. Skulls and bones all over the place. Garl is missing for this dungeon and he was my best healer up to this point. It is here I discovered how great Mending Light is. The undead foes are tough taking both a lot of damage and dishing it out.

Glacial Peak

I really enjoyed the theme here. It’s a snowy mountain climb. The movement of your characters shines here as it really feels like a climb: you’re climbing upwards, balancing on narrow cliff ledges, and using your grappling hook to cross gaps. Boulder Douche is a hilarious enemy. It’s an ice golem that acts like a DJ and jams out to the background music.

Torment Peak – They nailed the dark and disturbing theme of this dungeon. Much of the dungeon is dark and misty but not so much as to be annoying to navigate. There are strange growths all over that look like organs. The enemies look demented.

Bosses

Botanical Horror

This giant plant has a center bulb and four buds. The buds do the attacking. The center is immune while the buds are up and will restore them when they’re all down. Group attacks, including offensive Combos, were useful to take the buds down. One time the center restored the buds but I had a Combo ready to go: “Actually, what if you aren’t back up?”

Stormcaller

A fight against a pirate captain who has conjured a perpetual storm. His special attack hits hard, was hard for me to disrupt, and I love the animation. Stormcalled falls backward off the cliff onto a serpent who then uses a breath weapon that counts as three hits. Blocking not only lessens the damage but builds the Combo gauge faster to charge up Mending Light.

One and Three – These villains have been teased a lot and here you get to fight them. They put up a good fight with Three especially doing high damage. One is more defensive and can block and counter attacks. Neither has a lot of HP though so it’s not an endurance test.

Dweller of Torment

This horrible monster has three parts: head and two arms. The arms provide extra attacks and keep the head up. Sonic Pain does a lot of sound-based hits to the team. Dwellers take like 8x more damage from Sun/Moon abilities so charging up Valere and Zale is paramount. They were able to keep the arms down to reduce the Sonic Pain’s the group faced.

The fight lasted long enough to charge up Seraï’s Ultimate. Ultimates take a lot to charge up and I hadn’t got one before. Her Ultimate was to teleport in her pirate crew and summon cannon fire from their ship, the Vespertine. Lots of damage to all targets and without using MP or Conbo charges.

***** PLOT SECTION, SPOILERS AHEAD *****

Solstice Warriors vs. Dwellers

The world is constantly assaulted by Dwellers, monstrous minions of The Fleshmancer. These monsters are near invincible. Only solstice magic, sun and moon, can harm them. Only children born on a solstice can use solstice magic. They are then taken into the Zenith Academy and trained to become Solstice Warriors.

Valere and Zale are two young people about to become full-fledged Solstice Warriors. They have trained for a decade at the academy under Headmaster Morraine and two older Solstice Warriors, Brugaves and Erlina. When they joined the academy they were separated from their friend, Garl, and the rest of the village. They yearn for when they become full-fledged Solstice Warriors and get the freedom to move around again.

As soon as they complete their training they are tasked with going to Wraith Island. The last known Dweller, the Dweller of Woe, resides there. Dwellers are too powerful even for Solstice Warriors but the Warriors’ powers are enhanced during an eclipse. The Solstice Warriors and Morraine plan to meet at Wraith Island during an upcoming eclipse to destroy the Dweller.

The Dweller of Woe

Just after setting out Valere and Zale are reunited with Garl. Garl has been training to join the two on their adventures. Meanwhile, the player sees scenes of four Acolytes are watching the Solstice Warriors and planning something nefarious.

The group travels to the port town of Brisk. Nobody in Brisk wants to sail to Wraith Island as those that go never return. They find a group of pirates willing to go, led by Captain Klee’shaë. The people on Wraith Island are mind controlled into never leaving. Every so often the Dweller of Woe, a banshee, makes one go to her mansion where she consumes them.

After arriving the group attempts to defy the Dweller on their own by preventing a mind controlled villager from going to the mansion. In retaliation, the Dweller tries to mind control Garl to his death. An assassin named Seraï arrives to help. She uses a poison to paralyze Garl to buy time to find a cure for him.

Garl is cured in time for the eclipse. Morraine, Erline, and Brugaves arrive. The full group storms the mansion and take on the Dweller of Woe. With the combined strength of all the Solstice Warriors and the eclipse the Dweller is destroyed, leaving its core behind.

Then the Acolytes appear. Shockingly, Erlina and Brugaves betray everyone. They side with the Acolytes and capture the core of the Dweller of Woe. With their power they revive the Dweller of Strife, a Dweller who decimated the Solstice Warriors in the past. Strife’s revival levels the city of Brisk.

Searching for Hope

Things are grim. Morraine fought Strife before. Strife killed two dozen Solstice Warriors the first time, leaving Morraine the sole survivor. Morraine, Valere, and Zale don’t stand a chance. Consumed by despair, Morraine gives up and resolves to live a peaceful life until the end of the world. But Valere, Zale, Garl, and Seraï will not give up.

The Acolytes went to Mesa Island where their stronghold is. It’s protected by a shield. Searching for a way to disable to shield, the group goes to the Tower of Antsudlo, an underwater tower.

The Immortals

Throughout the game you see scenes of The Archivist narrating over the journey so far. The Archivist notes that the group cannot defeat the Dweller of Strife. The Dweller will become a World Eater, dooming the world. As the group reaches the top of the tower they find a door and knock. The knock is heard in the Archivist’s chamber. He wonders what will happen if fate is given a nudge.

The Archivist lets the party inside. He introduces himself as Resh’an. He’s not just an Archvist but the Immortal Alchemist. He is the rival of the Fleshmancer, who is named Aephorul. Both of them are immortal alchemists. Aephorul became twisted and evil and Resh’an has opposed him since. But they also have strict rules to their contest and Resh’an hesitates to break those rules for fear of Aephorul’s retribution.

The Dweller of Torment

Resh’an tasks the group with retrieving his Vial of Time. To get it they will need to cleanse Torment Peak. The group is shocked to hear a Dweller is there. Resh’an puts an enchantment on the group to preserve their minds on Torment Peak. The peak is cursed such that any who enter soon leave and lose their memories of what was there. That’s why nobody knows there is a Dweller there.

Torment Peak is a horrific place with strange organ growths. There are sentient gorilla babies there yearning for their mother. Their mother, the Gorilla Matriarch, is a powerful spirit imprisoned by the Dweller. She is now cursed as the Dweller calls her babies one-by-one to walk by her and be its food.

The Dweller is in a deep cave where the light of sun and moon cannot reach. Without the power of an eclipse, the group cannot win. But Seraï uses her portal abilities to create a portal to the outside. Valere’s and Zale’s powers have grown to where they can summon an eclipse. Now with an eclipse shining into their fight, the group is able to win.

After that, Resh’an agrees not only to help the party directly but joins them. But he still has strict rules. He warns he cannot help fight a Dweller. But now they have what they need to storm Mesa Island. There they will face the Acolytes, Erlina, Brugaves, and the Dweller of Strife.